Introduction
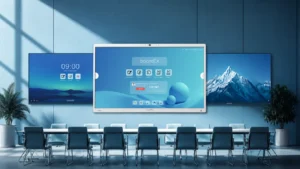
Traditional classroom tools often limit student engagement and collaboration. As schools and universities move toward digital learning, interactive flat panels have become an essential part of modern classrooms. These panels support touch-based interaction, multimedia learning, and real-time collaboration, making lessons more engaging and effective.
Interactive flat panel installation in schools requires careful planning, technical setup, and professional execution. It is not just about mounting a screen, but about creating a reliable and safe learning environment. This guide explains the complete installation process step by step so educational institutions know what to expect and how to prepare.
Table of Contents
Pre-Installation Planning and Assessment
Evaluating Classroom Requirements
Before installation, each classroom must be assessed individually. Room size and seating layout determine the appropriate screen size. Smaller classrooms usually require 55 or 65-inch panels, while larger classrooms and lecture halls benefit from 75 or 86-inch displays.
Lighting conditions also affect visibility. Natural light from windows and overhead lighting can cause glare if the panel is placed incorrectly. Power outlets, network connectivity, and WiFi strength must be checked in advance, especially in older school buildings.
Wall structure is another critical factor. Interactive flat panels are heavy and require solid mounting surfaces such as concrete or reinforced walls to ensure safety and long term stability.
Choosing the Right Panel
Selecting the correct panel ensures long term performance and usability. Screen size should match the classroom dimensions to avoid visibility issues. Most schools prefer 4K resolution panels for clear text and visuals.
Touch technology is also important. Infrared touch is commonly used in education due to durability and multi touch support. Operating system compatibility should align with school IT systems to support existing teaching tools and software.
Budget planning should include the cost of installation, training, and ongoing support, not just the panel itself.
Site Survey and Preparation
A professional site survey helps identify the best mounting position and confirms technical readiness. During the survey, installers check power supply, network access, cable routing, and mounting height.
Accessibility is also considered to ensure teachers and students can use the panel comfortably. Proper preparation reduces installation risks and avoids delays.
Required Tools and Equipment
Professional installation requires proper tools and safety measures. This includes mounting brackets or mobile stands, electrical testing tools, network equipment, and calibration tools.
Safety gear is essential during installation due to the weight of the panels. Cable management systems are also used to keep classrooms safe and organized.
Step-by-Step Installation Process
 1")
Step 1: Preparing the Installation Site
Installers mark the mounting points based on panel size and classroom layout. Wall strength is checked, and electrical access is confirmed. Cable routing is planned to avoid exposed wiring.
Step 2: Installing the Mounting System
The mounting bracket or mobile stand is installed securely. Wall mounts are fixed into reinforced points, and leveling tools are used to ensure alignment. Mobile stands are assembled and tested for stability.
Step 3: Electrical and Network Setup
Power connections are set up using surge protection. Ethernet or WiFi connectivity is configured according to school network policies. Cables are concealed to maintain safety and a clean appearance.
Step 4: Mounting the Interactive Flat Panel
The panel is lifted and mounted by a trained team using safe handling techniques. All connections are secured, and stability is checked before moving to the next stage.
Step 5: Connecting Devices and Peripherals
Computers, document cameras, and audio systems are connected using HDMI, USB, or wireless options. Compatibility and functionality are tested to ensure smooth operation during lessons.
Step 6: Software Setup and Configuration
The operating system is configured, and the required educational applications are installed. Network authentication and cloud access are set up, and screen sharing features are tested.
Step 7: Calibration and Testing
Touch accuracy is calibrated across the entire screen. Display and audio settings are optimized for classroom use. All connections and multi-user functions are tested before handover.
Post Installation Classroom Setup
After installation, the classroom layout is adjusted to improve visibility and interaction. Seating arrangements may be updated to support collaborative learning.
Cable management is finalized to remove safety risks. Accessibility features are enabled, and teacher control areas are organized for ease of use.
Training and Onboarding
Teacher training is essential for the effective use of interactive flat panels. Training covers basic operations, software navigation, lesson creation, all panel tools, screen sharing, and more.
Teachers are also guided on troubleshooting common issues. Clear usage guidelines help students interact with the technology responsibly.
Maintenance and Best Practices
Regular maintenance ensures reliable performance and extends panel lifespan. Daily cleaning using approved materials helps protect the screen.
Software updates and periodic calibration keep the system running smoothly. With proper care and support, interactive flat panels typically last seven to ten years.
Common Installation Challenges and Solutions
Connectivity issues may occur in busy school networks and can be resolved through network upgrades or wired connections. Older buildings may require wall reinforcement or trolley stands.
Glare problems can be minimized by adjusting placement or using suitable display settings. Compatibility checks help integrate panels with existing systems.
Conclusion
 2")
Interactive flat panel installation in schools is a structured process that requires planning, professional setup, and ongoing support. When installed correctly, these panels transform classrooms into engaging and collaborative learning spaces.
Schools and universities that invest in proper installation and training gain long-term value from their interactive flat panels. Working with experienced professionals ensures reliable performance and maximum educational impact.
Frequently Asked Questions (FAQs)
1. What is interactive flat panel installation in schools?
Interactive flat panel installation in schools is the process of securely mounting the panel, setting up power and network connections, configuring software, and preparing the classroom for effective use. It also includes testing, calibration, and ensuring safety and accessibility.
2. How long does an interactive flat panel installation take?
Installation usually takes between two to four hours per classroom. The exact time depends on wall structure, network readiness, and whether additional devices or software setup is required.
3. Can schools install interactive flat panels themselves?
While basic installation may seem possible, professional installation is strongly recommended. Interactive flat panels are heavy devices and require proper wall support, electrical safety checks, and technical configuration to avoid damage and safety risks.
4. What size interactive flat panel is best for classrooms?
The best size depends on classroom size and viewing distance. Small classrooms often use 55 or 65-inch panels, while larger classrooms and lecture halls typically require 75 or 86-inch displays for clear visibility.