Universities across Saudi Arabia are rapidly expanding their hybrid learning programmes. As a result, PTZ camera setup lecture hall from Riyadh to Dammam. However, in many cases, the installation is carried out without a clear plan, and the camera ends up in the wrong position, connected incorrectly, or configured in a way that fails during live lectures.
This guide covers how a PTZ camera setup for a lecture hall is carried out properly, from the pre-installation checklist through to auto-tracking configuration.

What Is Needed Before Installation Begins
Before the camera is mounted, a few things need to be confirmed. Skipping this stage is the most common reason for poor results.
- The room dimensions are measured, specifically the width of the teaching area and the distance from the back wall to the front of the hall
- The primary connection method is confirmed: USB, HDMI, or network (NDI or IP)
- The video conferencing platform in use is identified, whether Teams, Zoom, Cisco Webex, or Google Meet
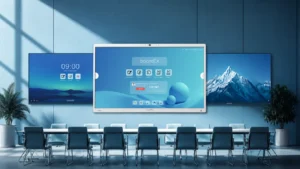
- The interactive flat panel is confirmed as the main display and input source for the session
- Ceiling or rear wall brackets are selected based on the room layout
Additionally, it is worth reviewing whether a PTZ camera is the right fit for your space. For institutions still evaluating camera options, the comparison of PTZ camera vs fixed camera for lecture recording provides a useful starting reference before committing to a setup.
Recommended Camera Positions by Hall Size
Camera placement is determined by the size of the lecture hall. The following table is used as a starting guide.
| Hall Size | Recommended Position | Mounting Height | Zoom Setting |
| Small (up to 30 seats) | Rear wall, centre | 2.5 to 3 metres | Wide angle |
| Medium (30 to 60 seats) | Rear wall or ceiling, centre | 3 to 3.5 metres | Moderate zoom |
| Large (60 to 120 seats) | Ceiling mount, front third of hall | 3.5 to 4.5 metres | Optical zoom active |
For large lecture theatres, a ceiling-mounted position in the front third of the hall is strongly preferred. From this position, the camera is able to capture the lecturer without obstruction, and the auto-tracking system can operate across the full width of the teaching zone.
Step-by-Step PTZ Camera Setup for a Lecture Hall
Once the position is confirmed and the bracket is installed, the following steps are followed in order.
Step 1: Mount and Secure the Camera
The camera is fixed to the bracket and the pan and tilt joints are checked to confirm full range of movement. The lens is pointed toward the teaching zone at the front of the hall.
Step 2: Connect to the Interactive Flat Panel
A USB or HDMI cable is run from the camera to the panel. For network-connected setups, the camera is enrolled on the institutional LAN and the IP address is assigned. The interactive flat panel for university lecture halls supports USB-C, HDMI, and network input simultaneously, which allows the PTZ feed to appear directly within the conferencing interface on screen.
Step 3: Configure the Video Conferencing Platform
The PTZ camera is selected as the active camera input within Teams, Zoom, or whichever platform is in use. A test call is placed to confirm that the feed is stable and that the image is sharp at the back of the hall.
Step 4: Set Up Auto-Tracking
Auto-tracking is enabled through the camera’s control interface or the accompanying software. The tracking zone is defined to cover the width of the teaching area only. This prevents the camera from following students in the audience, which is a common misconfiguration in large halls.
Step 5: Save Preset Positions
Three preset positions are saved: a wide shot of the full teaching area, a close-up of the interactive panel, and a mid-range shot of the lectern. These presets allow the lecturer or IT team to switch angles during the session if needed.
Common Mistakes to Avoid
- Mounting the camera too high, which causes the auto-tracking to lose the subject when they move toward the front row
- Placing the camera off-centre, which creates an uneven field of view that cannot be corrected through zoom alone
- Setting the tracking zone too wide, so the camera follows audience movement instead of the lecturer
- Skipping the test call, which means connection issues are only discovered during a live lecture
- Using a consumer-grade USB camera in a large hall, where the built-in microphone and lens are insufficient for the space
Ready to Set Up a PTZ Camera at Your University?
The boardEX technical team carries out full PTZ camera installations across universities in Riyadh, Jeddah, and Dammam. Wiring, positioning, calibration, and staff training are all included as part of a single installation visit. To arrange a site survey or request a campus demo, please get in touch with the boardEX team directly.
Frequently Asked Questions
Can a PTZ camera be set up without an IT specialist?
Basic setups can be completed by a technically confident staff member. However, for large halls where ceiling mounting, network configuration, and MDM integration are involved, professional installation is recommended to avoid issues during live lectures.
How long does a full lecture hall PTZ installation take?
A standard single-room installation is typically completed within half a day. Campus-wide deployments across multiple lecture theatres are scheduled room by room to avoid disruption to the academic timetable.
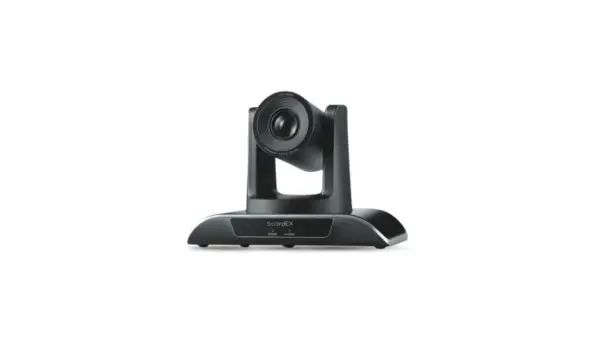
Is the boardEX PTZ camera compatible with all video conferencing platforms?
Yes. The boardEX Vision Pro PTZ Camera is compatible with Microsoft Teams, Zoom, Cisco Webex, and Google Meet, which are the platforms most commonly used in Saudi universities.